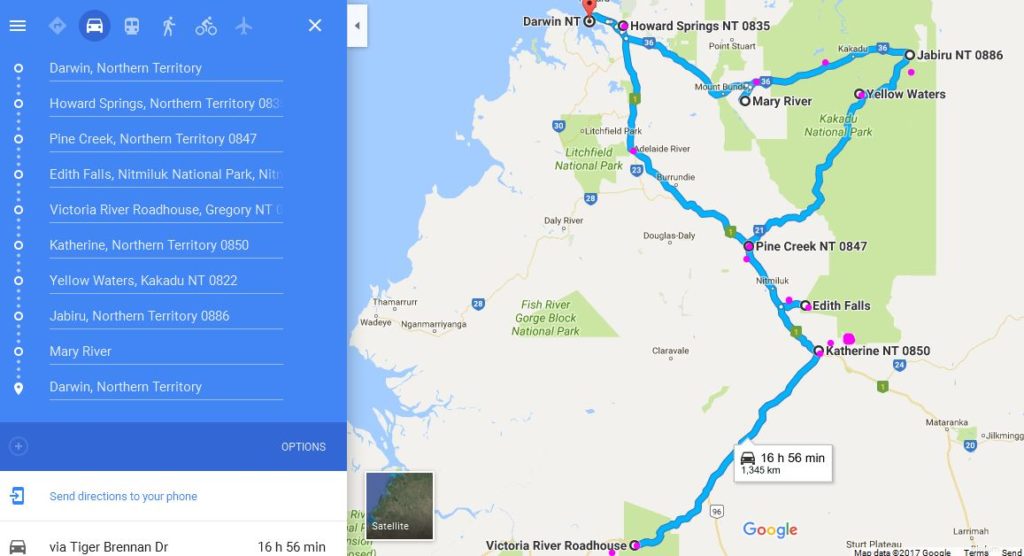
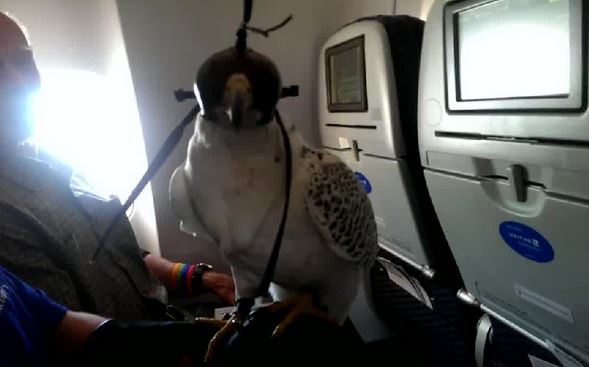
Over the last year or so, I have been using eBird to help plan my travels. I am usually a species-focused birder when I travel. That means I have certain species in mind and I will plan my trip to locations where I am most likely to see that species. Another style of planning might be when you have a trip booked to a destination and you want to know where to go birding and what kind of species you might find there. For example you have a business trip to Sydney and would like to get in some birding in your spare time. But the steps below are basically what I do.
STEP 1
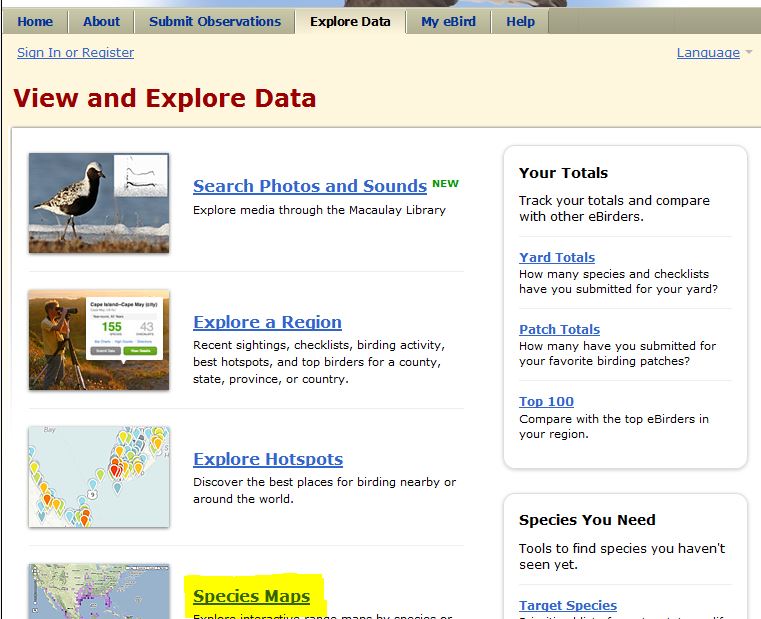
Go to eBird, set up an account or log in if you already have one. Then click on Explore Data and scroll down to Species Maps.

STEP 2
Enter the name of the species you want to see-either in English or the scientific name. In the examples below, I will be using the Hooded Parrot which was one of my target species when we went to the Northern Territory of Australia. The technique works no matter where you want to go and which birds you want to see. African Grey Parrots in Uganda, Resplendent Quetzals in Costa Rica or Antpittas in Ecuador are all there to be found!
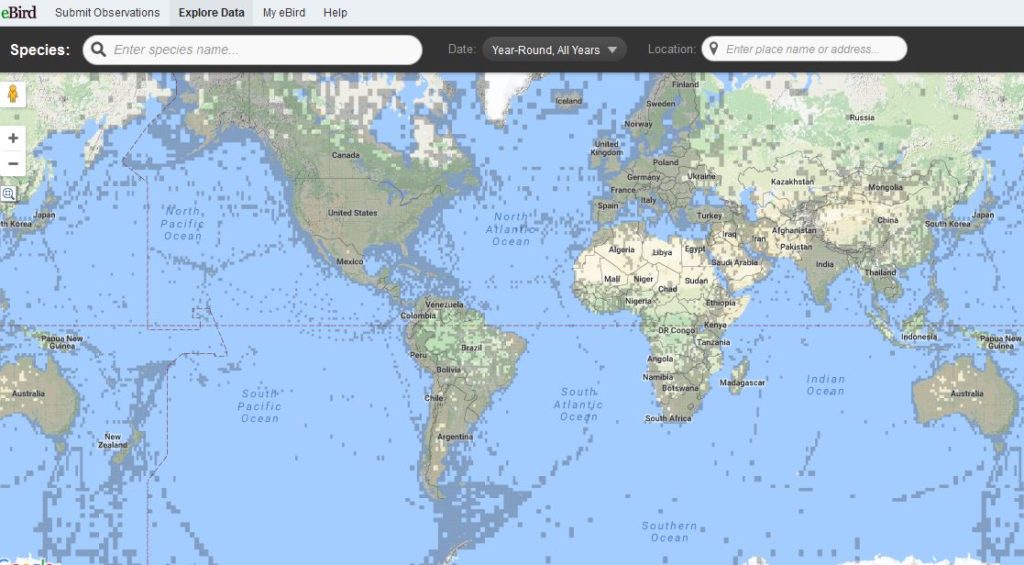
Now that I have entered the Hooded Parrot, I can see where they are concentrated – just south of Darwin in the Northern Territory of Australia. This tells me what airport I will need to fly into to begin my trip. The darker the purple, the more sightings of that species have been logged in eBird.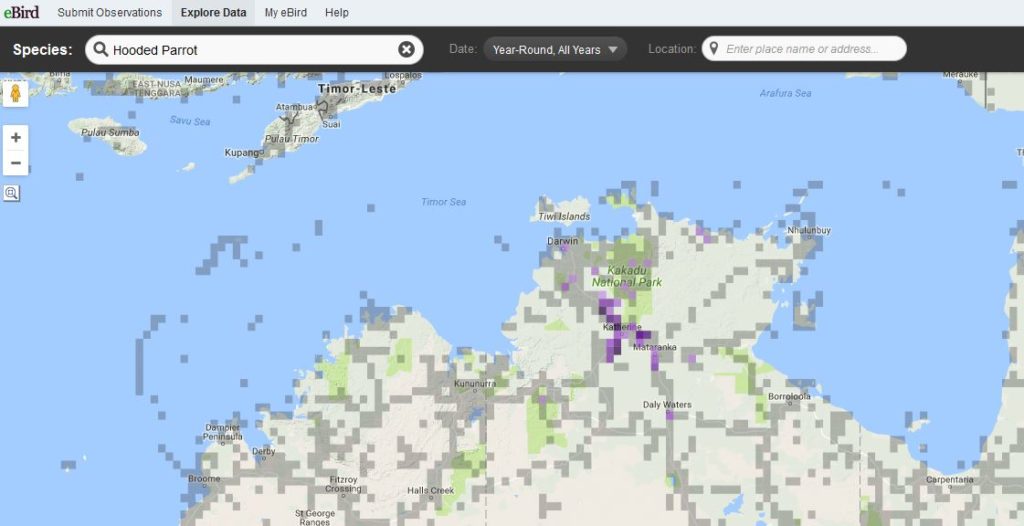
STEP 3
Refine the search by using the dates I want to travel. I will usually choose the quarter that represents the month I will be there and a 10 year data. Sometimes I scale that back to the most recent 3 years if there are a lot of results. Also pay attention to red points as they represent sightings of a bird within the last month. I also click on “Show Points Sooner” on the right side of the screen to make all those points appear.
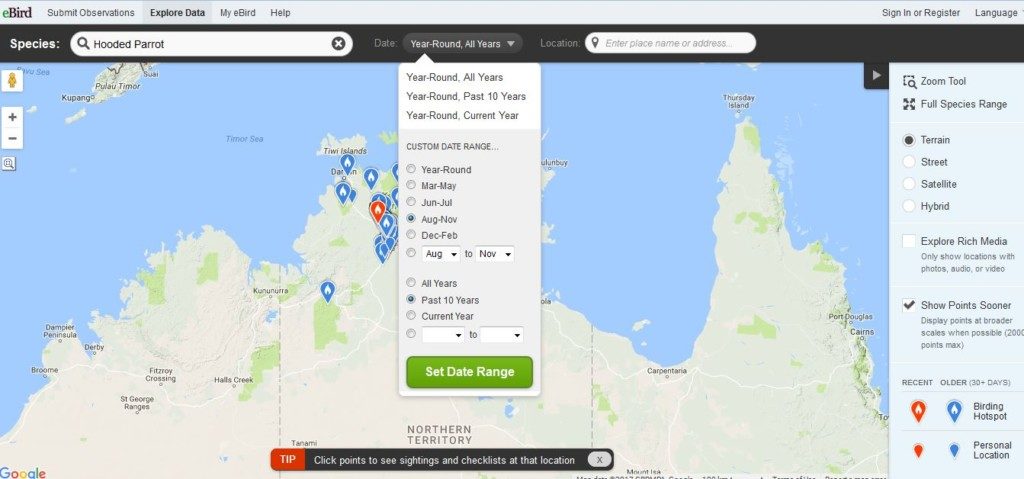
By zooming in, I can see the big concentration of points around Pine Creek, Nitmiluk and Katherine. I note that either would be a simple 2-3 hour drive south of Darwin. I like to organize my birding for early mornings and late afternoons and use the middle part of the day to drive from one place to another.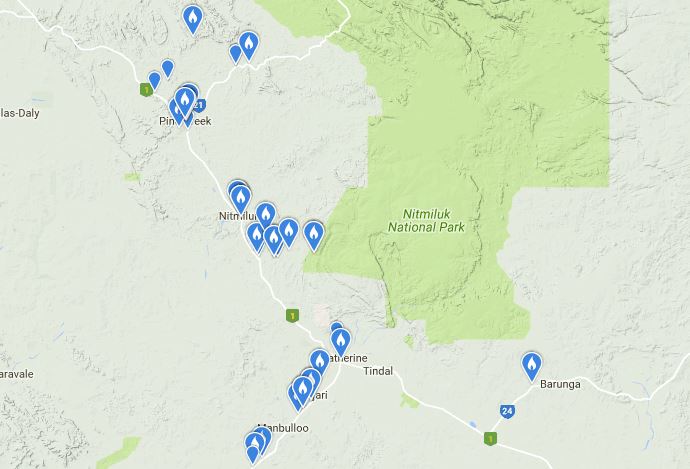
STEP 4
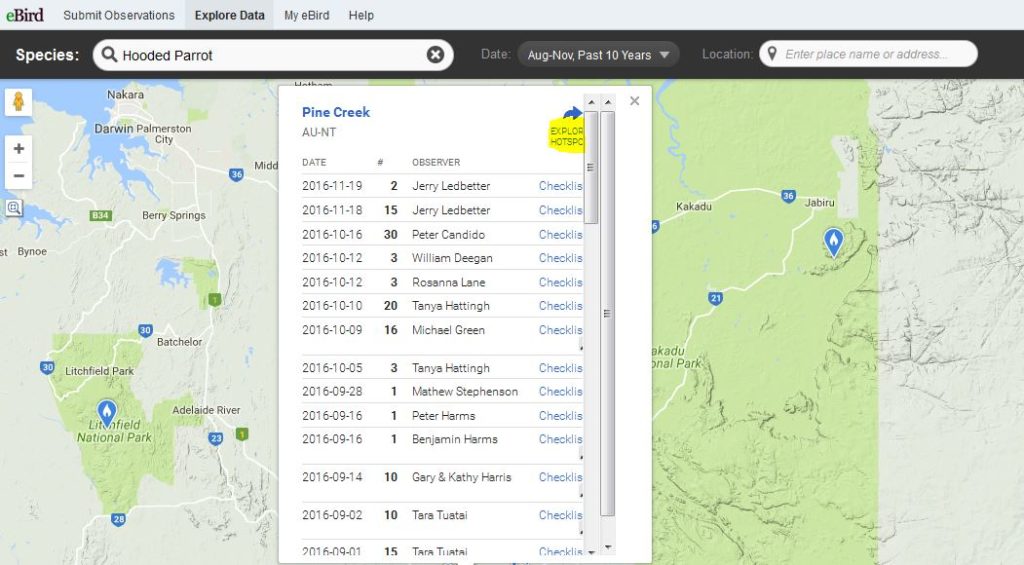
Now I want to examine these “points” that represent bird sightings in more detail. I will right click on each point in the general area and open in a separate tab. I want to see what the numbers look like. Are they big flocks being constantly seen over a period of weeks or months? This indicates the birds are common to the area and you have a good chance to spot them. You can also see exact locations such as which park, what street, etc. This location looks really good, various people (including me) are reporting good sized flocks. So now I want to examine the Hotspot in more detail. Right click on “Explore Hotspot” highlighted in yellow.
STEP 5
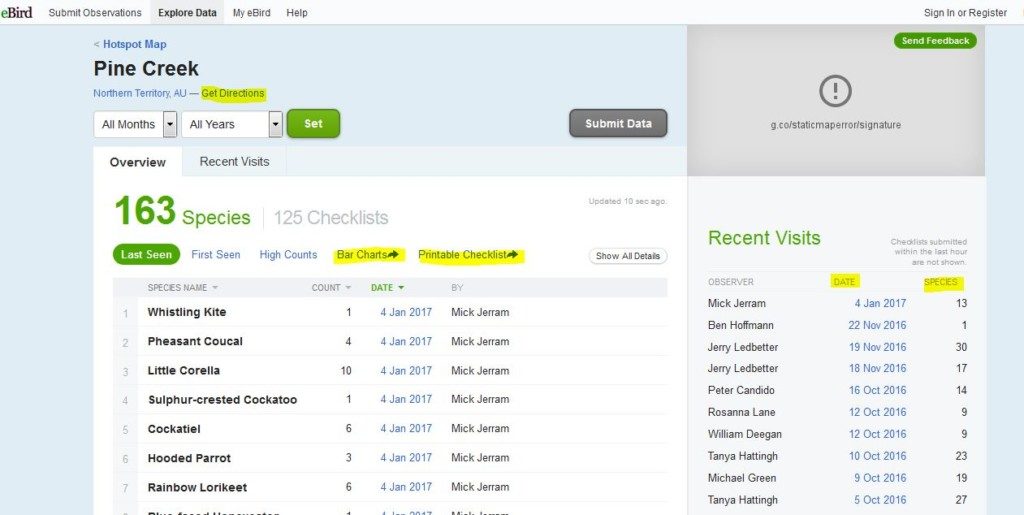
Research the Hotspots. If you are a destination birder rather than a species-specific birder you can come straight to the Hotspot section (see Step 1) and skip the other steps. Seeing my target species is exciting enough but seeing a lot more birds in the same area is even better. If I have limited time, I want the most “bang for my buck” so I want a Hotspot that not only has my target but lots of other interesting birds as well!
I have highlighted in yellow the information I want from this screen. “Get Directions” will get me a Google map to the exact location of the Hotspot. On the right side, I am looking at how many species are in the average checklist to get an idea of what other birds can be seen and how common they are. I also take note of names which appear on a regular basis. These people will be locals, maybe even birding guides so their lists are more likely to be accurate.
STEP 6
Examine the bar chart for patterns in when the birds are being seen. For example the Hooded Parrot is commonly seen between July to December. They haven’t been reported at all in this location between mid January to June so I am glad my trip is in September! One thing to note: This location is pretty popular and gets a good amount of reports. If you don’t see the bird being reported in a particular month, always check to see if ANY birds have been reported in the month. For example if I were going in March, I would be concerned that no one has reported Hooded Parrots in March but other birds ARE being reported so it’s not a case that no one has filed a report yet for that month. Birders are there in March, the Hooded Parrots are not there.
Now I scroll though to see what other birds are likely to be seen in September – quite a few parrot species so this looks like a great spot!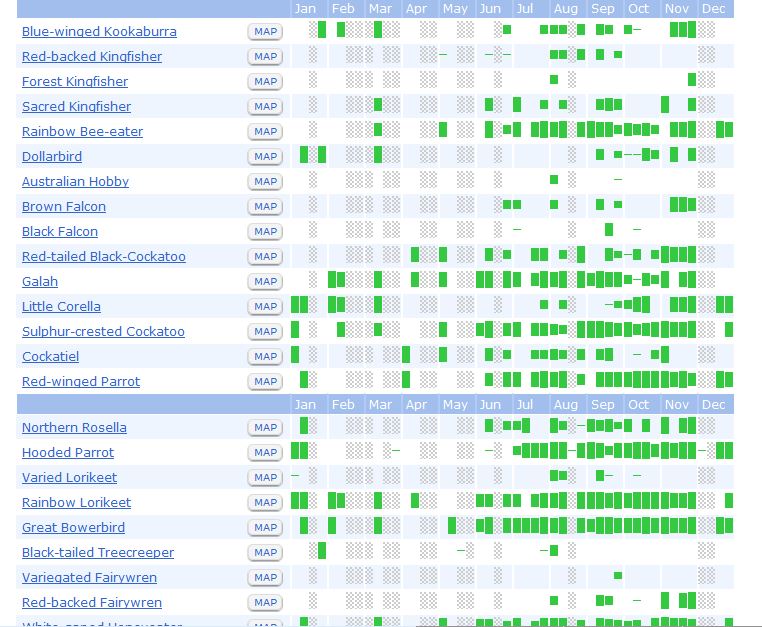
STEP 7
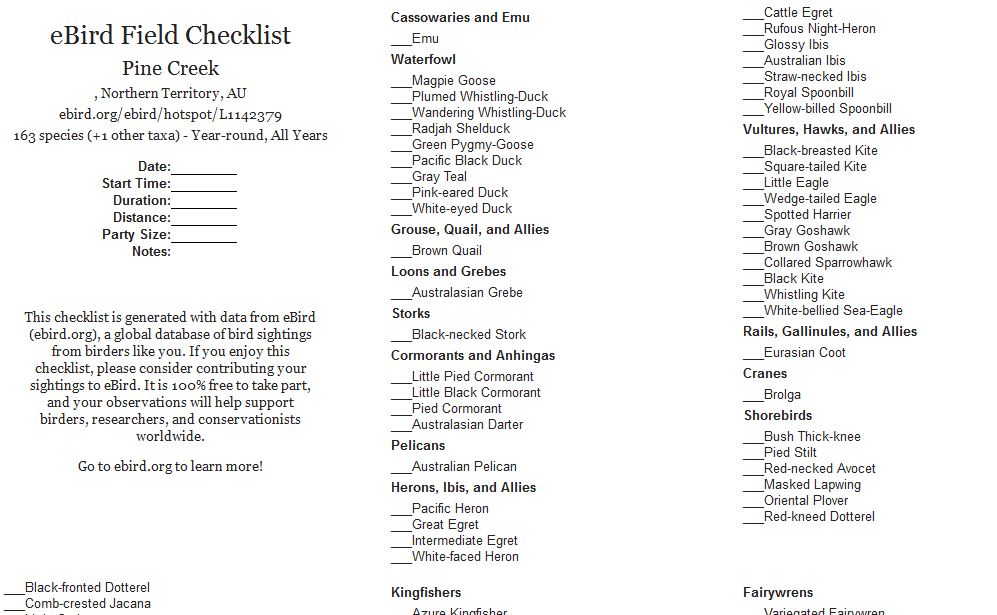
OK I know it isn’t “green” to print things out but it can be very handy to have a checklist readily available. This is the first time I used this feature on a birding trip and it was invaluable to help me remember what I saw. It also helped me identify some birds. I would Google the bird species and match the results against my photos.
STEP 8
Most people have more than one target species in mind when they go birding. I do this procedure for all of my main target species (usually parrots but also bowerbirds, fairy-wrens, Gouldian finches). Then I compare the checklists and bar charts to see what is the fewest number of stops I have to make to get all the desired species. I had about 20 “Must-sees” for this trip to the Northern Territory.
STEP 9
I like to cross reference what I learned from this procedure with other birding reports such as those found on Cloudbirders, Surfbirds and anything else that pops up on Google! Sometimes I find good recommendations for accommodation and guides.
STEP 10
Now that I have my birding Hotspots sorted, I can start to look at other travel arrangements. I need to fly to Darwin, rent a car and get accommodation near each of those Hotspots!
